Insert the tube end into fitting cup, making sure that the tube is seated against the base of the fitting cup (Figure 7.11). A slight twisting motion ensures even coverage by the flux. Remove excess flux from the exterior of the joint with a cotton rag (Figure 7.12).
Support the tube and fitting assembly to ensure a uniform capillary space around the entire circumference of the joint. Uniformity of capillary space will ensure good capillary flow (Figure 7.18), of the molten-solder metal. Excessive joint clearance can lead to solder metal cracking under conditions of stress or vibration.
The joint is now ready for soldering. Joints prepared and ready for soldering must be completed the same day and not left unfinished overnight.
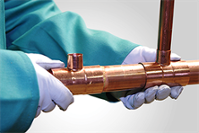 Figure 7.11. Assembly
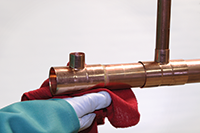 Figure 7.12. Removing Excess Flux
 Figure 7.18. Schematic of Solder Joint